Showing posts with label Stars. Show all posts

Friday, January 24, 2014

Backyard Camp-out

Today I am thankful for simple activities that bring such joy to the boys.
Jeremiah set up the tents in our backyard a few summers ago and the boys had so much fun playing outside until it got dark.  We then slept in the backyard and had a fun night with the kids.  
For this page I used a denim looking blue card-stock and backed the photos in an orange card-stock to match the tents in the pictures.
I used diamond dew drops to create the stars here in the page.  I cut stars out with a punch and placed the dew drops on them.  I like the look they created.
For this sleeping under the stars sign I used my cricut and the camping critters cartridge.  I used the stars that were cut out from this and placed them on the top part of the page. This little sign came out really cute.  I love using my cricut to help add more character to my pages.
Overall the backyard camp-out was a lot of fun and I am glad we got a few pictures of the fun time we had and was able to make a fun page for our family album.
Happy Crafting, 
Tara


Tuesday, December 24, 2013

Outing to Old Colorado Territory Days..

Today I am grateful for the fun family outing we had last summer with all of the boys to the Territory Days in old town Colorado.


Jeremiah decided it would be fun to have the old fashioned pictures taken while we were there.  The boys loved getting to hold the guns and be dressed up like cowboys.  They all looked so cute too, even little Weston who was just three months old was all decked out like a little stud.  They were all so good and we really got some great shots.  I have had these pictures hanging around my room where I can see them because I have loved them so much and I was so happy to finally put them into a scrapbook.


This one made me laugh so hard when we first saw it, everyone was in perfect character pointing their guns at daddy, and looking at him too.  I used the striped side of the Cowboy paper from The Robin's Nest.  I used some brown mailbox letters for my words.  I stamped and embossed the scallops, stars, and paisleys with the Wanted stamp set and a copper emboss powder from Stampin; Up!.


Just a little close up of the embossed scallop circles.


Again I used the mailbox letters, and this page shows off my embossed paisleys. I placed these on the page with foam pop ups to give the page just a little more dimension.  
We could not have asked for a more perfect picture, everyone is actually looking at the camera, eyes are open and smiles all around!!


  I know we all really enjoyed taking these pictures and they whole day just being together.
I love having pictures of the fun memories we have made together as a family and love to be able to scrapbook them and share it with others.

Happy Crafting, 
Tara

Wednesday, October 9, 2013

3D Stars

Hello and welcome, I am going to share a project that I did a few years ago but thought now was a great time to re-share it, and I also had it re-pinned on Pinterest recently and I told a gal Michelle that I would get the instructions up for her, so thank you for the motivation to post something.  

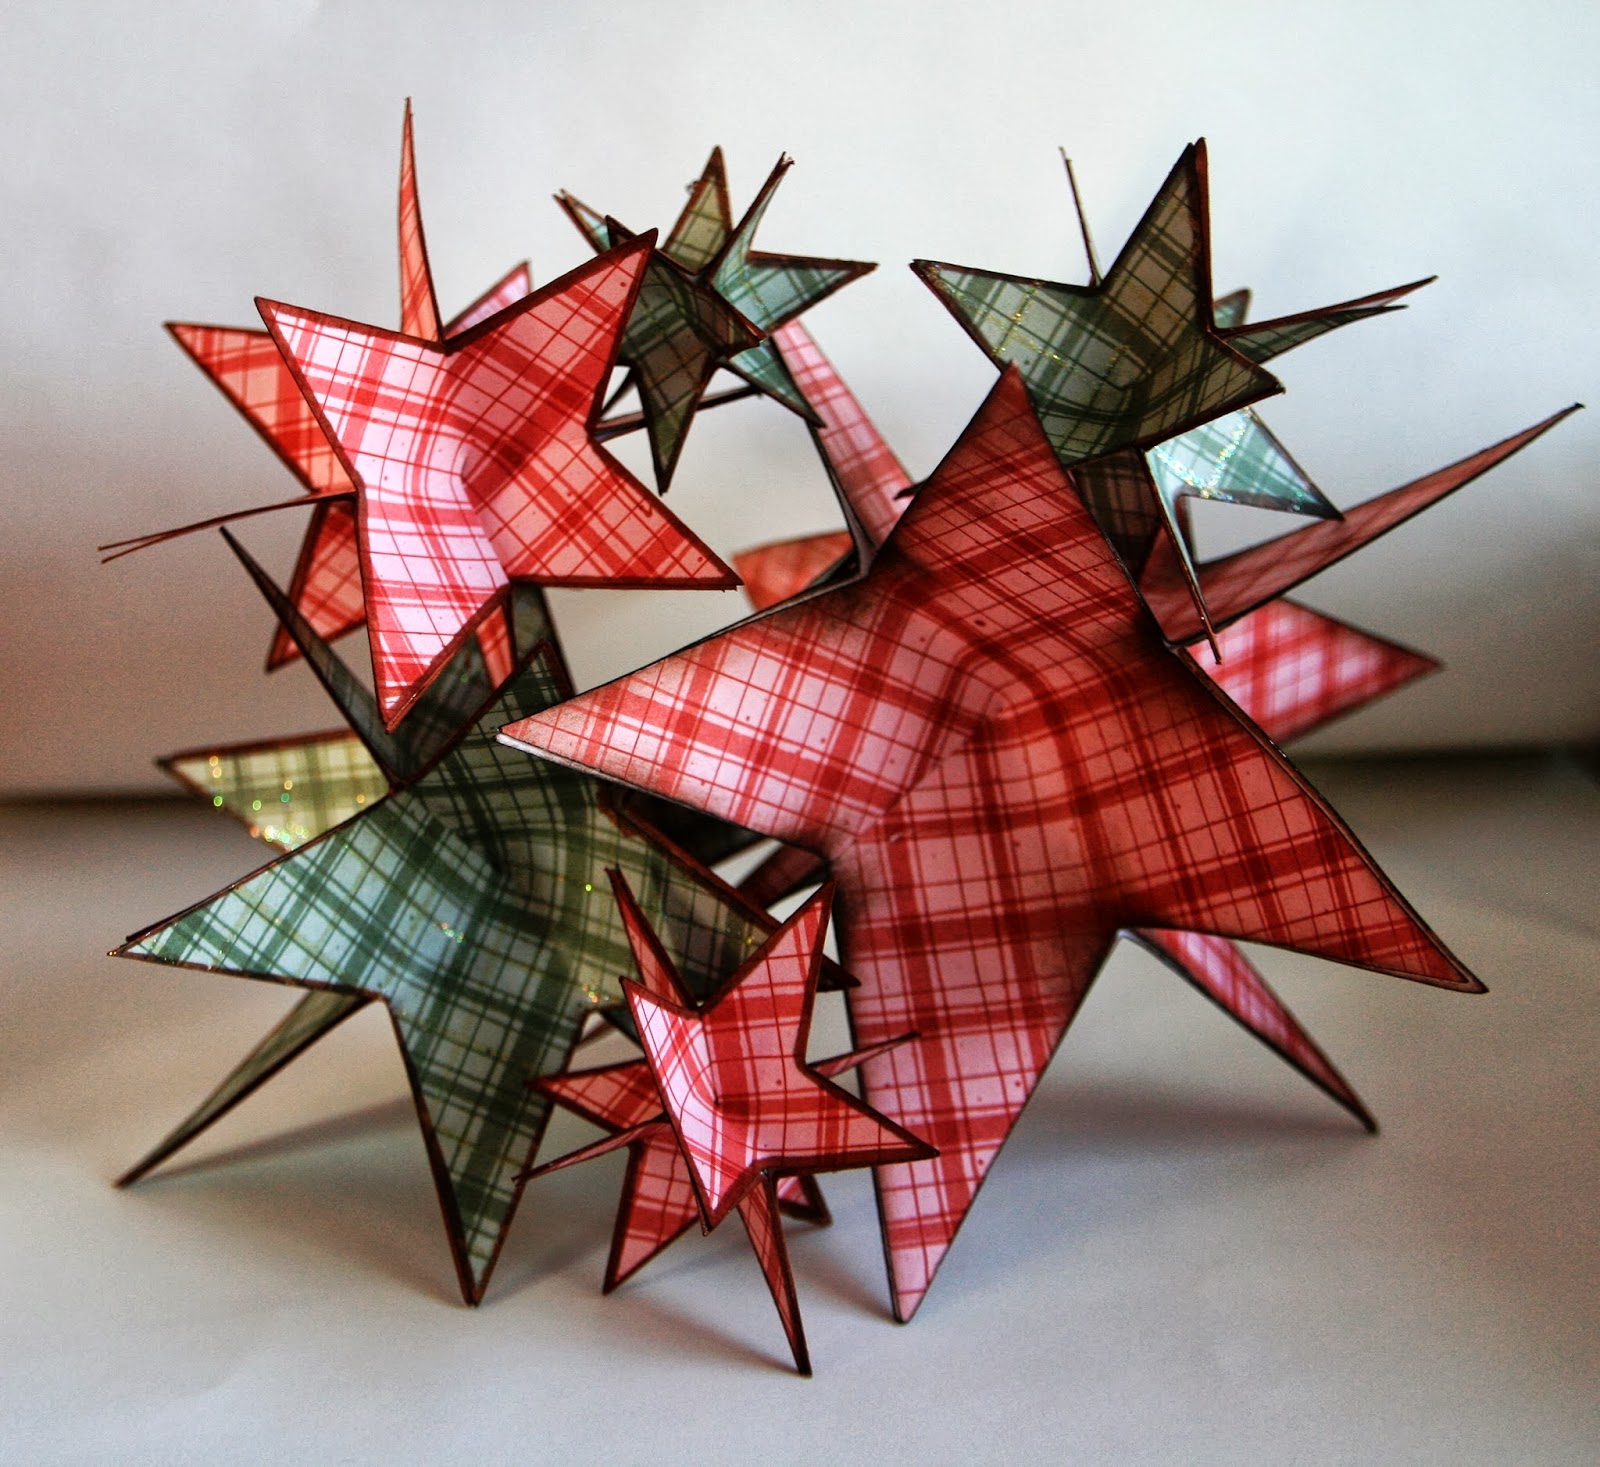
Here is what our finished project looks like.
You are going to start with six stars in any size and also any print of paper that suits your fancy.  I used this fun paper from The Robin's Nest ( http://robinsnest-scrap.com/ )  I cut these stars out with my cricut machine.  I am sure you could also find some clip art online that would work fine too.
Next you are going to make a cut through the middle of each of the stars as shown below. 
(there are only four of the six stars shown in this picture...you do need all six )
After you cut each star, you are going to fold one of the points over the other on all six stars so you only have four points to each star and glue into place.
Here is a look at it from the front.
Here are all six stars folded and glued.
Next you are going to start gluing them together, be sure to line the points up as best you can.  They will not all line up perfect so don't stress about that
Getting the first three-four together is no problem, it gets a little tricky, but not to hard with the fifth and sixth.
You will notice here below that you can see white from the back side of the paper I used, if this doesn't bother you, you are basically done with this step.
If you are like me and the project doesn't feel quite finished with the edges white, I just took a brown Sharpie marker and colored along the edges to give them a more completed look, you could also sponge the edges with ink if you like that look better. With that the fun 3D stars are a finished success!! 

These are a super fun and easy project to do.  I used them in my home as a centerpiece for the holidays, mixing two colors and several sizes together to make a great "pop".  You could also add a ribbon and hang them on a tree or just as a hanging decoration in your home.  

Thanks so much for looking and please if you have questions or comments don't hesitate to ask/share.

Happy Crafting, 
Tara